PyDynamic tutorials

Currently archived
This accompanying selection of tutorials and examples is archived as well as the upstream project is.
Previously this was meant as a collection of tutorials and examples to document, explain and illustrate the possibilities offered by PyDynamic. As such it is still relevant for its latest release.
Getting started
To get going with the tutorials you can either start directly in your browser or get a local copy and experiment offline on your machine.
Quick start in current browser session
To start working in the notebooks directly in the browser, click ![]() .
.
Get a local copy to work offline
To get started on your local machine, follow these simple steps:
Clone the repository, if you haven’t already
Set up a virtual environment for PyDynamic_tutorials
Install the dependencies
Start the Jupyter Notebook server
Go to localhost:8888 with your favourite browser
Browse the various examples in the repository, alter and execute the code right in your browser
1. Clone the repository
$ git clone https://github.com/PTB-M4D/PyDynamic_tutorials.git
Cloning into 'PyDynamic_tutorials'...
[...]
Receiving objects: 100% (3/3), done.
$
2. Set up a virtual environment
On your command line/powershell execute:
$ python3 -m venv PyDynamic_tutorial_venv
$
This will create a subfolder PyDynamic_tutorial_venv and prepare a fully self-contained Python environment, which we can activate in the next step and install further Python packages without polluting or disturbing your system environment.
3. Install the dependencies
First we activate the previously created environment before we then install the required
dependencies in two steps, because we are utilizing pip-tools to ensure you get a
working copy of our environments.
$ source PyDynamic_tutorial_venv/bin/activate
(PyDynamic_tutorial_venv) $ pip install --upgrade pip pip-tools
Collecting pip
[...]
Successfully installed click-7.1.2 pip-20.1.1 pip-tools-5.2.0 setuptools-47.1.1 six-1.15.0
$ pip-sync requirements/requirements.txt
Collecting attrs==19.3.0
[...]
Installing collected packages: attrs, [...]
webencodings-0.5.1
$
4. Start the notebook server
Now from the environment we created previously, start up the Jupyter Notebook server.
$ jupyter notebook
[I 13:01:24.790 NotebookApp] Serving notebooks from local directory: ~/code/PyDynamic_tutorials
[I 13:01:24.790 NotebookApp] The Jupyter Notebook is running at:
[I 13:01:24.790 NotebookApp] http://localhost:8888/?token=f368c552e042d48d46ff4c8a094448d0e7681790b0719215
5. Go to localhost:8888
Usually a browser window will have opened automatically at this point. Otherwise, just
open one yourself and navigate to the printed URL in the console, in our case
http://localhost:8888/?token=f368c552e042d48d46ff4c8a094448d0e7681790b0719215.
6. Browse the various examples
You should see something like the following:
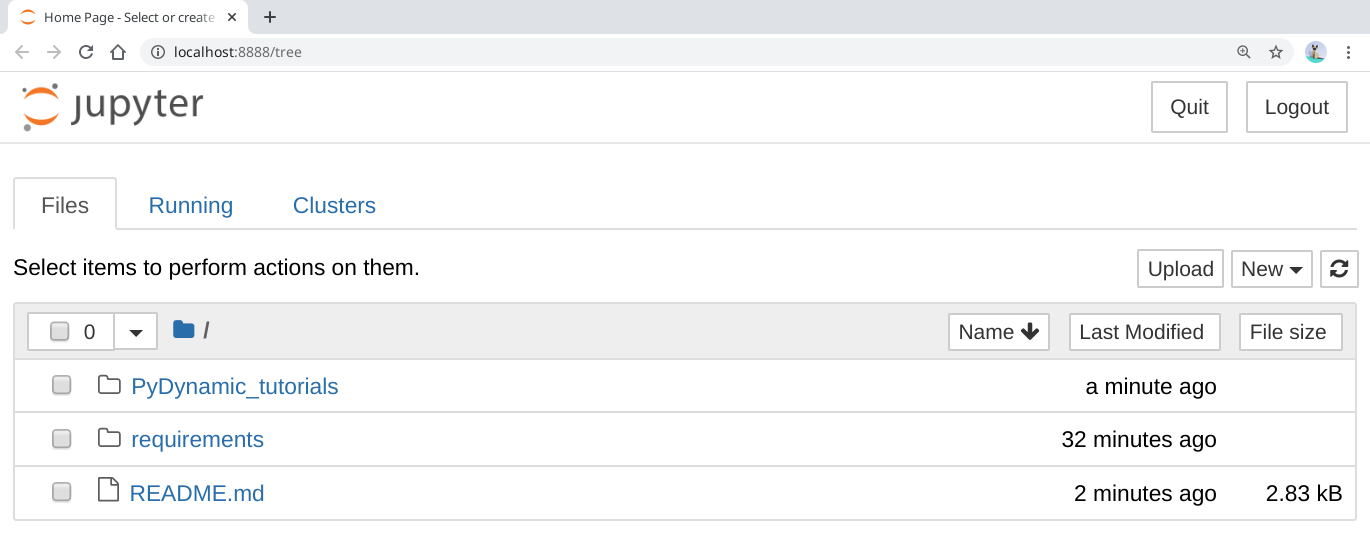
After a click on PyDynamic_tutorials the source code can be edited and executed directly in the browser.
PyDynamic
The sourcecode of PyDynamic is available on GitHub. The detailed documentation of PyDynamic’s source code is available on pydynamic.readthedocs.io. The tutorial notebooks are all linked on these pagKes along with additional material.